Have you ever heard of mailcow?
The price of servers is crashing. I can’t believe how cheap servers are getting and how powerful they are now. I went out and purchased a box and decided to fire up a less important domain for testing. I have an awesome colocation place nearby that is super cheap, and I decided to host my own email server.
I wanted to set up a mail server. I have set up many in the past for clients, and now it was time to self-host one for myself. Clients have different needs than I do; I have a lot of personal domains and other things that I wanted on this box, so I needed to set up something easy to use for my wife and me as well as the four kids we have.
Groupware and other solutions are available, but I decided to go with something simple and fast.
I can tell you I have tried every third-party email service there is. I have used Protonmail, Outlook/Exchange, Rackspace, iCloud, and more… I still, to this day, have my Lavabit email address as well. Crazy
For clients, I have always done raw services on Linux so that things could be tuned or exchanged. Those seem to be the most corporate solutions. They are great solutions, but for a family and hobbyist like myself, I did not want the time costs or the upfront money costs of Exchange. So, after making the decision not to set one up completely service-based myself, I decided to try the Docker-based mail server suite called “Mailcow” and let me tell you what a joy it has been – awesome!
Mailcow is dockerized, and so easy to manage. It technically is a mail server suite and there are a ton of features I will most likely not use but that is ok.
This article aims to tell you how to get it up and running fast and relay any issues I have. Also, I want to write down my experiences from the first few months of using Mailcow and finally come to a verdict as to what possible disadvantages of using it are and whether they, are worth it.
Spoiler alert: I can not recommend this system enough.
The Installation
First things first, I had to install Mailcow. I had a new server, and as stated, I wanted to use it for other things, so I installed a Virtual Environment system that is open-source… more on that later.
The installation itself is pretty straightforward. As my grandfather would say here is the short form.
Installing Mailcow
- Update System Packages: sudo apt update sudo apt upgrade.
- Install Required Dependencies: sudo apt install curl git.
- Install Docker: curl -fsSL https://get.docker.com -o get-docker.sh sudo sh get-docker.sh.
Yea, super easy right… well, there are some prerequisites:
- You need to have Docker as well as Docker Compose installed easily…
- Mailcow comes with fully integrated Groupware; it can sometimes be quite resource-heavy. Lucky for me, I have a shit load of ram in this box. I am told that many of these components can be disabled, though, and aren’t necessary for the average user. I am not going to get into that now. I have to agree that most are not needed, but let’s assume you need everything.
So I started with the installation by cloning mailcow-dockerized’s git repository in the /opt/mailcow-dockerized/
# git clone https://github.com/mailcow/mailcow-dockerized && cd mailcow-dockerized/
Boom… easy
Once cloned, you just run the included generate_config.sh script to generate the necessary configuration files interactively. Finally, I start Mailcow the same way we do with any other docker-compose project.
Again super easy if you are familiar with docker.
# docker-compose pull && docker-compose up -d
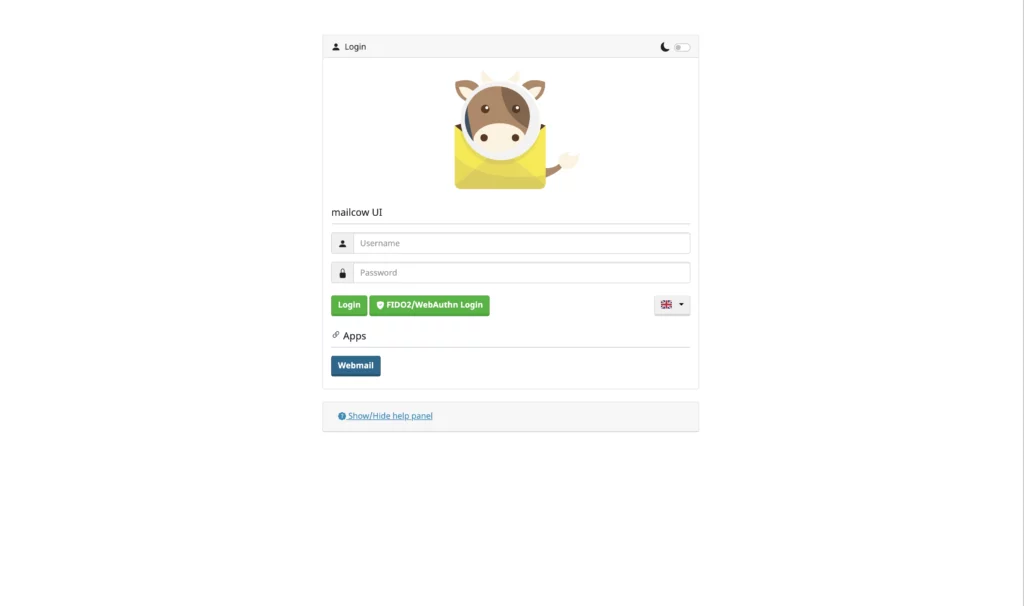
After that, it was off to Mailcow’s sexy web interface. You navigate to the hostname you specified during the configuration generation. In my case, I created a mail subdomain on my server’s main domain.
You should be able to log in using the credentials default credentials.

The Dashboard
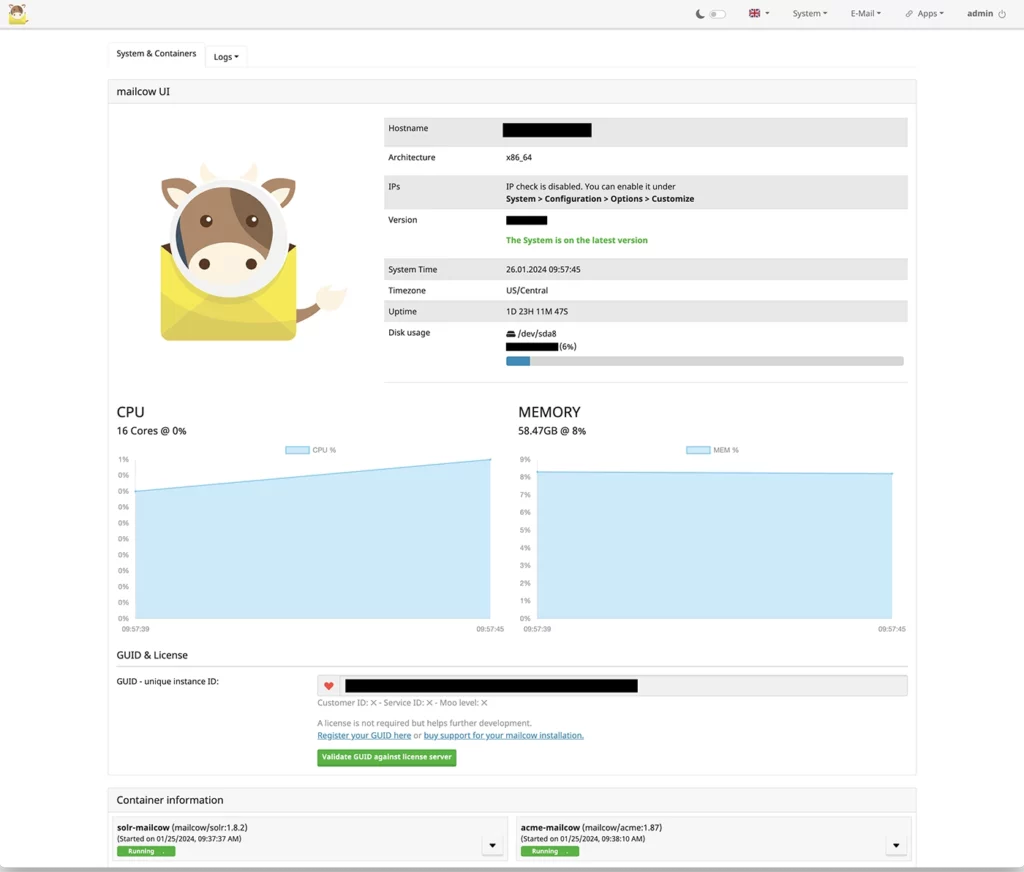
I have to say, once into the system, I was impressed. I love a good GUI, and this web UI is awesome. That said, there are a few things I hope to change in the future, and maybe I will… more to come on that later.

Yeah… I redacted some stuff.
Next, it is the fun part! Time to set up a domain.

So the interface is so good you can quickly figure all of this out. If you want to add a domain, you pop over to Configuration → Mail Setup → Domains → Add Domain by simply filling in your FQDN — everything can be changed later on, so don’t worry about the first round setup. Best to get in there and test it out.
For months, I did not move any mission-critical email. I used a spare domain I had first tested sending and receiving, tested to see if people would get mail from me, etc. I wanted to ensure that mail delivery would not suffer before I committed critical domains to the system.
Once I added my first domain, I went over to Cloudflare and edited the DNS. Mailcow has a click-to-button for the DNS Records that you need.
In my case, I had already created most of them myself. But it was nice to see that there was some help.
Having created all essential records, I also wanted to use DKIM.
DKIM is an easy Mailcow that generates everything for you. You can see all of the configs under Configuration → Configuration & Details → Configuration → ARC/DKIM keys and generate a key for the respective domain. Nice feature!
Setting up Mailboxes

My next step was to begin setting up mailboxes. This is similarly straightforward as is adding domains and can be done at Configuration → Mail Setup → Mailboxes → Add Mailbox. The upcoming dialogue asks you for a username (i.e., the email address’s left part) as well as for a password. If you have multiple domains, make sure to select the right one!
Sending and Receiving Mails
I started using a live domain the day I set this up and I can tell you sending and receiving emails was a breeze!
You can do this either using SMTP/IMAP directly, or you can use the built-in groupware SOGo. I am an IMAP guy because that is what is best for me with the phone and the computer and tablets… that said the webmail is nice and I could see this becoming more important to me as it develops out.
If I can get the calendars and the contacts to sync with my iPhone, then that would be a smash hit, and I would most likely move to webmail.
As the former is probably self-explanatory (simply use Mailcow’s hostname as SMTP & IMAP server), I’ll go with the second approach at this point. You can access your Mailcow’s SOGo instance https://{MAILCOW_HOSTNAME}/SOGo and simply log in using the username and password you just chose.
By the way: SOGo provides you with a synchronizable calendar and contact management, too. However, I have not gotten that to work with all of my Apple APPS like calendars and contacts. Furthermore, SOGo supports ActiveSync — that is, you can add your mail account as an Exchange account and thus get immediate push notifications! I have also not tried this but I see that it is documented and have to get around to testing that.

Last but not least, not only administrators can log into the Mailcow UI (the one where you just added mailboxes). Users can, too — and subsequently create temporary aliases for themselves, view quarantined emails, change their password, or adjust their spam filter’s sensitivity. And there is more, mailcow allows iOS/macOS users to download a configuration profile, automatically setting up their account. I have not tried this yet but that is where you get the calendars and contacts on your phone.
Administrative Features
One thing I find great about Mailcow is the sheer amount of administrative features we’re provided with. Amongst those are:
- Aliases, Temporary Aliases & Domain Aliases
- Resources (e.g., you can manage a physical room as a resource, invite it to calendar events, and thus see when it’s in use, etc.)
- Sync jobs
- Filters & Address Rewriting (not unique to Mailcow but extremely easy to manage)
- Multiple administrative users, as well as domain-specific administrative accounts
- An extensive REST-API
- OAuth2-Support
- Automatic SSL Certificate generation and renewal
Updating Mailcow
A common task of all of us is to keep things up-to-date. With Mailcow, we can easily do this by going to our Mailcow directory and running:# ./update.sh
The script will update configuration files and all docker containers (which may sometimes take quite a while). Sometimes, the update script itself has changed which will require you to run it twice (it will, however, ask you to do so). Important files are being backed up beforehand.
My Experiences
I’ve been using Mailcow for about a year now and am very happy with it. I’ve been using it for myself, as well as my family, and I haven’t had any notable difficulties or problems.
Update: I did do some tuning because we started using this exclusively for our family email.
I mentioned above that at some point I might want to tweak Mailcow. Well, turn the time that I have been using it mailcow is not only being maintained but actively extended and developed. There a updates all the time and things are fixed and improved. I am very impressed by this I hope others invest in Mailcow and keep the team funded and working. They are doing a great job. I have personally now paid for some support and a license because I want to see this continue being developed.
When comparing the suite I installed about a year ago to today’s installation, there have been many new features and fixes. Also, if you compare it to Zimbra or email, it is light years ahead.
Security
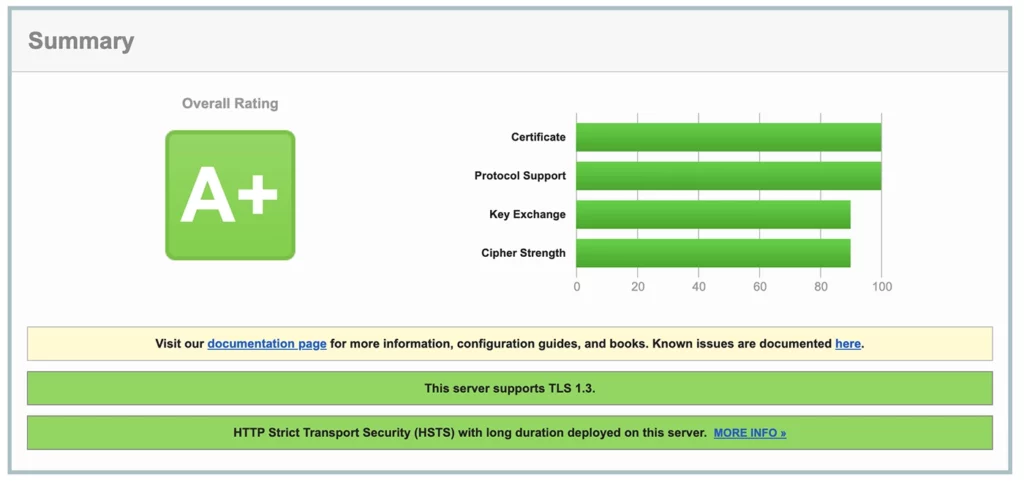
I am very impressed by the security of the system so far. I ran it in SSLLAB’s test and the results are awesome.

Disadvantages
In my opinion, the most significant disadvantage is the suite being so extensive and there are a lot of things you need to do to tune this beast. Most features I have never even used.
Mailcow comes with an XMPP messaging server. While there certainly are use cases for this, I won’t use them. Many of these services can be manually disabled via the configuration file.
Another thing is that logs are not accessible right from the start, so if there are issues, you will be looking for logs to try to diagnose the problem.
The Verdict
The bottom line with the increasing cost of reliable email that is not spying on you, Mailcow is great. I bet if Hillary had this she would not have had so many issues with her bathroom email server.
For someone like me who is not focused on mail server administration, Mailcow is an excellent way of having my fully-equipped mail server without spending time messing with service configurations and performance tuning.
Update: This is not true. I will have to performance-tune this if I want to use it for all my email accounts. Luckily for me, there is a great and active community, and the guys in Germany who run Mailcow will help you for a very small support fee. There is also a community you can get support from, and I have engaged in some of them.
For me, I am like the gardener who does not want to come home from work and have to mow my own lawn… so for those of you who rather want to “manually” configure their server and have absolute control over their system maybe this is not for you. While it is possible to do most stuff with Mailcow, it is probably easier to not use Mailcow in that case. But who has the time for that mess… unless you getting paid this is much better.
Below I am going to set up a list of key terms for you to know if you want to set up a mail server.
| Term | Definition |
|---|---|
| Mail server | Is a computer system that sends and receives email source |
| MX | |
| CNAME | Is an email-authentication technique that is used to prevent spammers from sending messages on behalf of your domain source |
| DKIM | Is an email authentication technique that allows the receiver to check that an email was indeed sent and authorized by the owner of that domain source |
| SPF | Is an email-authentication technique which is used to prevent spammers from sending messages on behalf of your domain source |
| DMARC | is an email validation system designed to protect your company’s email domain from being used for email spoofing source |
| Postfix | |
| Dovecot | |
| Qualys | |
